Do you want to develop / build your first mobile app? Maybe you can use an App Builder…
It’s often said that there’s “an app for that” and with over 178 billion apps downloaded in 2017, it’s certainly a popular marketing tool. Creating an app for your business offers an effective way to engage with your customers in a completely new way. It can complement your existing marketing efforts, whether that’s email, social media or offline.
In fact, consumers engage at a much higher rate at every step of the funnel via an app, compared to a mobile website. They convert 100-300% better than a website and spend 18 times more hours on the top 1,000 apps, compared the to top 1,000 websites.
But many business leaders might be put off creating an app because they think it needs a lot of resources. Like a snazzy development team. That’s simply not true – thanks to app builders, you can create an app with little-to-no coding knowledge. But if you want to create a game -something more complex-, you can take a look at these top 20 mobile game development platforms, as app builders won’t help with this.
Here’s how you get started.
Table of Contents
Steps To Build a Mobile App With An App Builder
Step 1: Set your goals
First, consider what you want your app to achieve. This will help you come up with the right design and format. You might want it to be purely information-based, for example, or to convert customers. Each has different end-goals and success metrics, so will need a different style of app. Whatever you choose, make sure it links back to (and has a measurable impact on) your business and marketing strategy.
Step 2: Pick your design
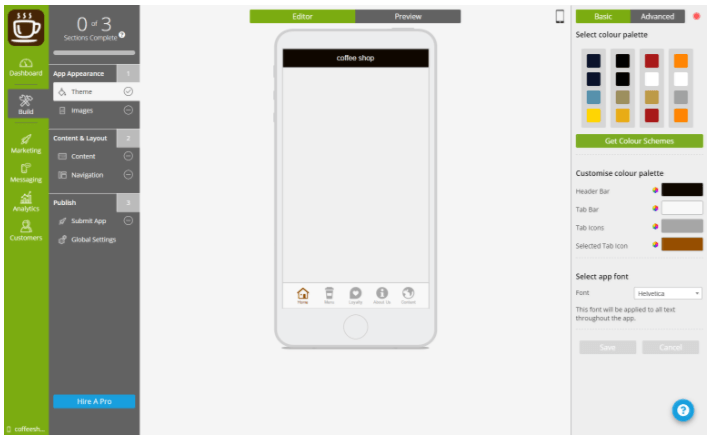
A lot of app builders will have pre-designed templates for you to choose from. These are a good starting point for your app and you can tweak them later-on to your brand’s specifics.
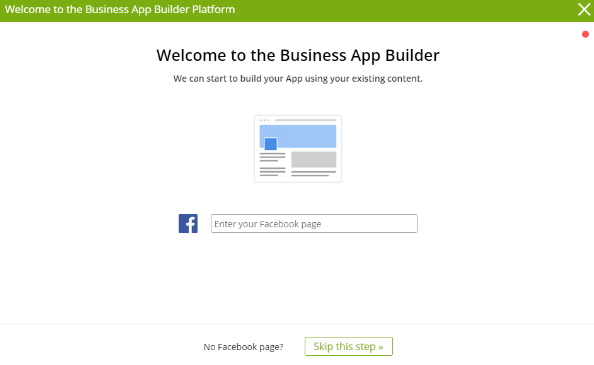
To speed things up, some app builders will also import existing information from your Facebook Business page:
After choosing your template, you can alter its colours, features, font, navigation style, splash screen and other settings to suit your business. This step is important to help differentiate your app and tie it into your branding. You can also upload specific images for your brand, or use stock imagery to help bring it to life. There’s many free stock photo sites, like Unsplash or Pikwizard, that offer artistic-looking pictures instead of the classic cheesy stock photos.
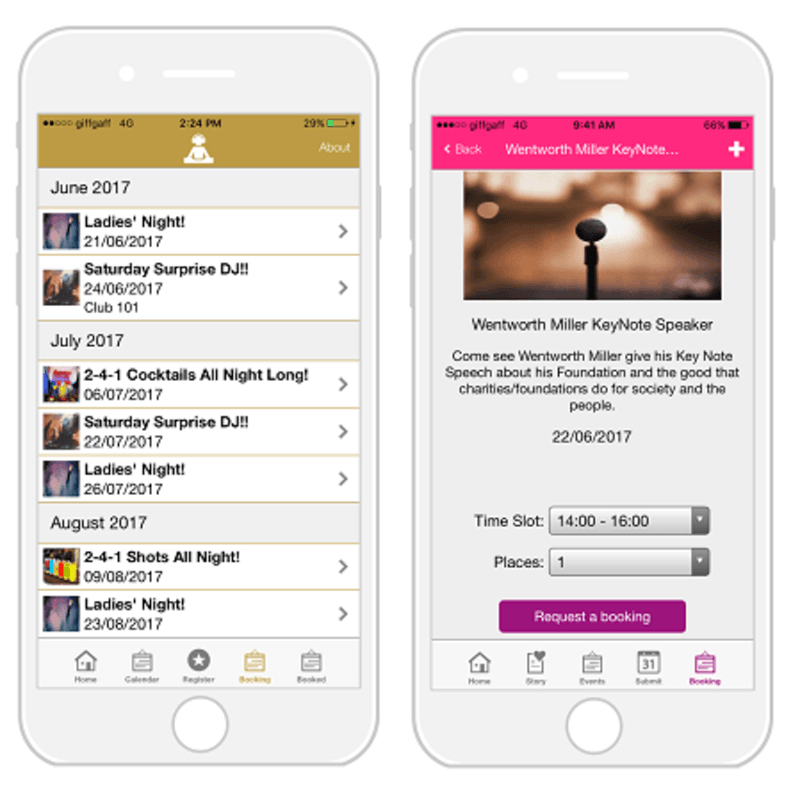
The features of your app directly tie into its goals and the steps you want users to carry out. If you want them to make an appointment, for instance, don’t forget to include a booking feature and calendar within your app:
 Don’t forget, if you mess up at any point you can always start again from scratch – or, to err on the side of caution, make a copy of your app as a backup that can be used if you bungle the original.
Step 3: Work on your content
Content is a critical part of your app and should link to your app’s goals and your target audience. If your app is going to be conveying information, then think about how your audience would like to receive it. They might be avid readers who would like written information and a blog shared through an RSS feed. Alternatively, they might be more visual, so your app should feature more imagery, graphics and video. Some app builders let you import videos direct from YouTube.
Step 4: Pick your app icon
Your app icon is that little image that sits on your phone’s home screen that allows you to launch an app. It’s vital to choose something eye-catching and relevant so people instantly recognize it. Take inspiration from some of the most used apps – Facebook has a clear ‘F’ style icon, whilst WhatsApp goes for a distinctive green and speech bubble. These app icons are also updated every year or so, to improve them and encourage use.

We recommend using a high-resolution image or graphic that’s 1024 x 1024 pixels in size. A pixelated icon isn’t going to attract any users. You might want to design your icon separately in a graphics software such as Photoshop and then upload it to the app builder.
Step 5: Sort your splash screen
The Splash screen is the first thing your users will see when they launch your app, so it has to make a good impression. Again, we recommend a high resolution and the size, this time, should be 1080 x 1920 pixels to get the best quality.
Try to choose an image that clearly conveys your brand at a glance. You want to get people excited and engaged with your app from the first screen, so use an image that connects with why they’d want to use your app in the first place. For example, if you’re targeting wine connoisseurs, pick an image of the exclusive wines that they can learn about within.
You’ll also need a header bar image, which will appear throughout. For consistent branding, it’s best to use your logo.
Step 6: Preview and launch your app
At this point, you’ve almost completed the build of your app. Before making it live, preview it to make sure that you’re happy with its look, functionality and feel. Also check for any errors, dead links to external sites and typos. If you have a trusted colleague or group of your target customers you can also run through it with them. This helps to optimize the user experience and also checks for any mistakes you might have missed.
The store where your app ends up is largely up to the plan that you select with the app builder. Some will publish to the Apple and Google Play app stores, which are currently the largest. Others will offer a Progressive Web App (PWA), which is a blend of a mobile website and app. It might take a little while before your app goes live as it needs to be checked against each store’s criteria first.
Where you decide to market your app also depends on your audience and whether they are primarily iOS or Android users.
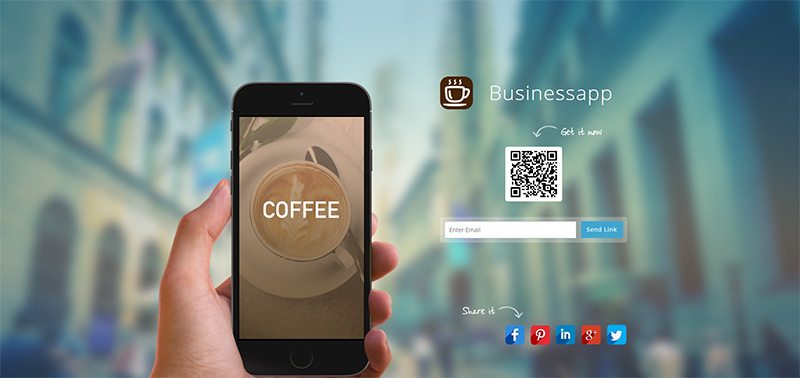
Step 7: Market your app
This is a crucial post-build step that ties your app into the rest of your marketing strategy. Depending on where your target app users spend their time, you might want to send out a launch email to your customers to tell them that there’s an app available, or post a series of updates to social media. You can also create a promotional landing page that offers more information about your app (and perhaps a demo video). QR codes can also make it easier for people to download your app.
Encourage existing customers or users of the app to share it with their friends. As an additional incentive, you can offer exclusive discounts for people who encourage others to sign up.
Some last considerations about building an app with an App Builder
Don’t make the mistake of thinking that your work is done once the app is built. It’s important to dive into your app analytics to understand how people are using it and to improve its user experience with each iteration. Likewise, share any positive reviews from users on your app store and wider marketing.
If people stop using your app then encourage them back through push notifications. You can also use these to engage with your users and tell them any news from your company.
Customer service is key, so make sure you’re answering any queries that come in from app users. Usually there’s a customer relationship management (CRM) tool included in the app builder.
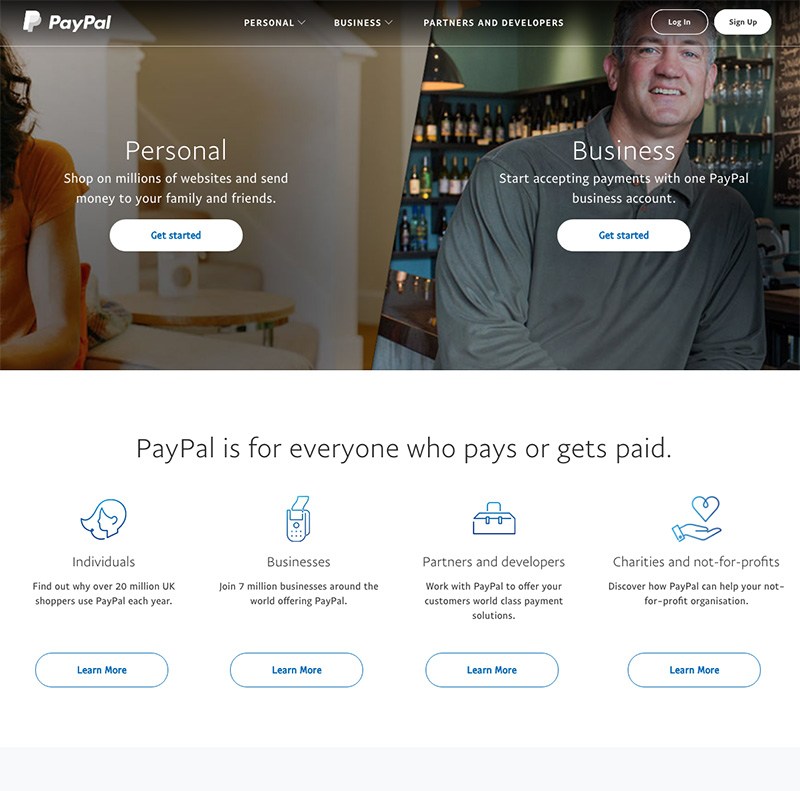
Lastly, if your app requires payments to be taken then think about how you will achieve this and what your local regulations involve. Integrating with PayPal will usually cover most business needs:
Building an app doesn’t have to be difficult or code-heavy. With an app builder it’s as simple as drag and drop. So what are you waiting for? Soon there’ll be an app for you, too.
Sharing is caring!
This is a guest post from Izaak Crook, the Content Marketing Manager at AppInstitute, a SaaS App Builder platform that allows anyone to create their own iOS and Android app without writing a single line of code.

2 thoughts on “App Builders: How To Easily Build Your First Mobile App”
Ilove the work executed in here, am set to go. My app is underway thus!
Good information that I have got but question is can i make may own app with out consulting other people